Identifying ghosts in Demonology can quickly become a guessing game without the right tools. To ensure you're fully equipped and don't have to rely on guesswork, here's our comprehensive **Demonology equipment guide** to help you master the art of ghost hunting.
How to Buy and Use Equipment in Demonology
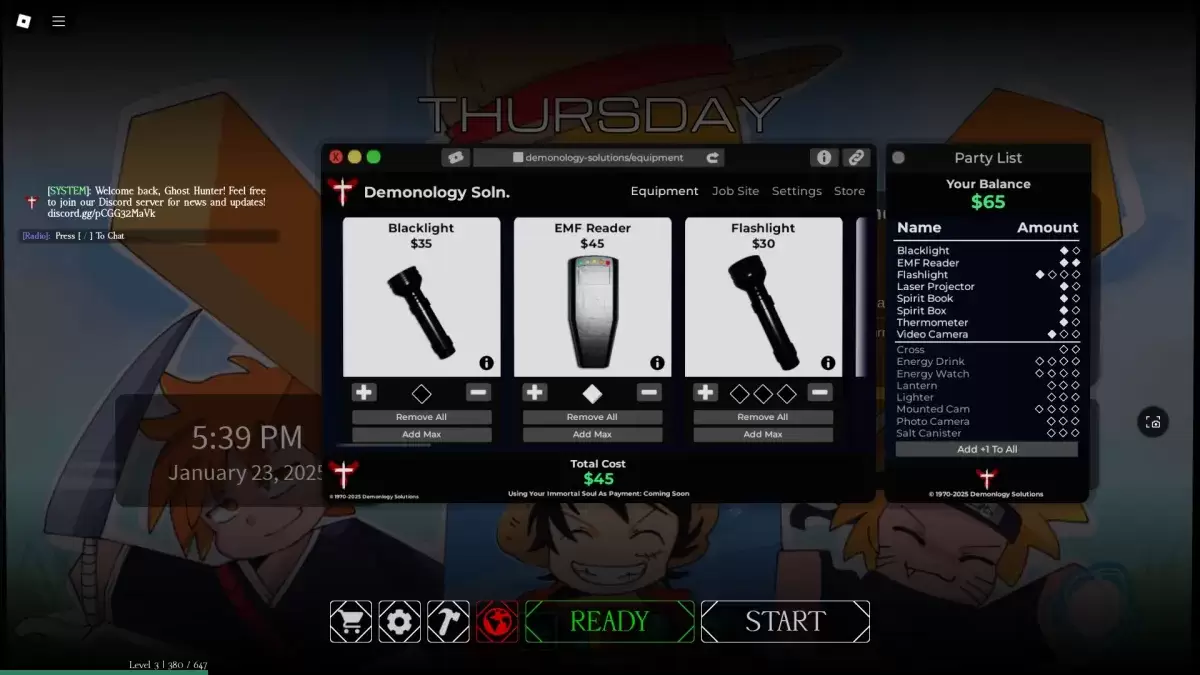 Equipment shop in the lobby
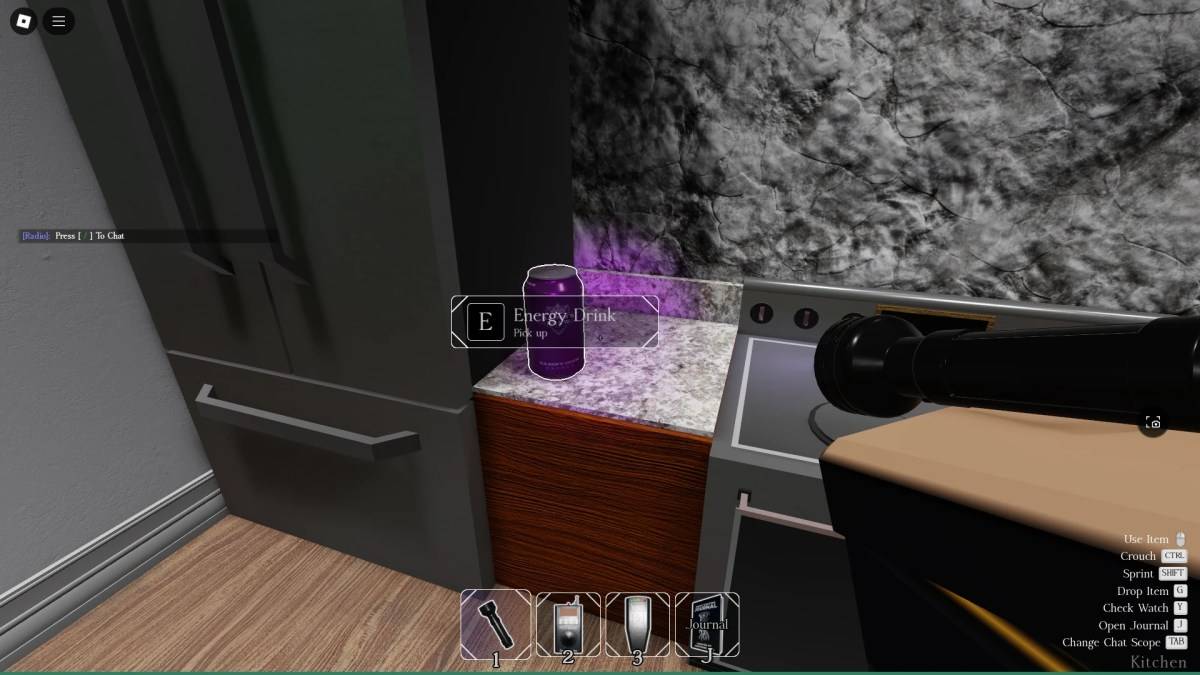 Energy Drink spawn in-game
Before diving into a Demonology run, you have the opportunity to **purchase additional equipment**. Remember, the **items** you buy will be available **only for the next run**, so make your purchases count. Occasionally, you'll find items spawning within the investigation areas as well. You can carry a maximum of three items at once. To use an item, press the **RMB (M2)** button, and to drop it, press the **G** key.
Evidence Equipment in Demonology
Evidence equipment is crucial for **identifying Ghosts** in Demonology. These tools help you **gather the evidence** necessary to pinpoint the type of Ghost you're facing. For a deeper dive, check out our guide on how to identify Ghosts in Demonology. Additionally, this equipment can be used to **lure Ghosts into manifesting** themselves, perfect for snapping those elusive photos.
| Item | Use | Party limit | Price |
|---|---|---|---|
| **Blacklight** | • Activate the Blacklight and scan for any fingerprints, handprints, or footprints left by the Ghost. | 2 | $35 |
| **EMF Reader** | • Use the EMF Reader to detect Ghost activity. When it senses a presence, it will light up and emit a loud sound. Drop it to use as a perimeter scanner. | 2 | $45 |
| **Laser Projector** | • Place the Laser Projector to emit beams that highlight any Ghosts moving nearby. | 2 | $65 |
| **Spirit Book** | • Leave the Spirit Book on the ground. If a Ghost that interacts with Spirit Books is nearby, it might pick it up and write in it. | 2 | $40 |
| **Spirit Box** | • Use the Spirit Box to communicate with Ghosts, though they might choose to ignore your attempts. | 2 | $50 |
| **Thermometer** | • Check the temperature with the Thermometer. Normal room temperatures are between 15-19 degrees; deviations could indicate a Ghost's presence. | 2 | $30 |
| **Video Camera** | • Use the Video Camera to spot Ghost Orbs. Place it on the ground and monitor through the PC at spawn. | 3 | $50 |
Optional Equipment in Demonology
Optional equipment in Demonology enhances your survival and aids in completing secondary mission objectives. Each piece of equipment has a limit on how many can be brought into a run by your party.
| Item | Use | Party limit | Price |
|---|---|---|---|
| Flashlight | • Use the Flashlight to illuminate your path in a cone-shaped beam. | 4 | $30 |
| Cross | • Use the Cross to repel a Ghost during a hunt. | 2 | $30 |
| Energy Drink | • Consume an Energy Drink to replenish some of your Energy. | 4 | $30 |
| Energy Watch | • Check your remaining Energy with the Energy Watch. | 4 | $50 |
| Lantern | • Hold the Lantern to prevent your Energy from draining. | 3 | $15 |
| Lighter | • Use the Lighter to ignite the Lantern and candles or as a light source. | 3 | $10 |
| Mounted Cam | • Similar to the Video Camera, but can be used alongside other items. Monitor it through the PC at spawn. | 4 | $50 |
| Photo Camera | • Capture images of Ghosts and other objects with the Photo Camera, useful for completing optional objectives. | 3 | $40 |
| Salt Canister | • Use Salt Canisters to ward off some Ghosts and secure handprint evidence. | 3 | $15 |
This covers everything you need to know about equipment in Demonology. For more insights and guides, explore the Roblox guides section on Escapist.
 Latest Downloads
 Downlaod


 Top News